
Around my trialling neighborhood, rubber contacts aren’t the norm (yet). While I think hope like mad that rubber will eventually come this way, it’s not currently on most of the equipment we trial on. With Des’s running contacts, I considered that training on rubber might make him think he has traction in places he won’t on sanded wood and could launch himself the wrong way when he hit the gas. But in the end, I went with rubber for two reasons:
1) I wanted the dogwalk that Des runs over most often to be as cushioned and safe as I could make it.
2) My DW sits outside in the sun and snow all year round. After six months, my well painted and sanded plywood ramps were already showing cracks. My DW frame is beautifully made (thanks, Tom!), but there’s really nothing anyone can do about the quality of ‘marine grade’ plywood these days. I’m just happy I’m not trying to build a boat!
So in the fine tradition of peer pressure (tell your friends!), I hope the following how-to may take some of the mystery out of sticking down that rubber and that traction-riffic contacts could become the norm in our agility neighborhood too. (come on, everybody’s doing it!)
I chose pre-made dogwalk skins from Rubber On the Run. Why? Dunc has run on NADAC spec rubber belting, rubber granules glued to an epoxy base, and rubber skins, and they all have good grip. For me, the granules were out…I’ve messed with epoxy a time or two and it’s easy to get it really wrong (reference above boat building fears...I had a bad experience)! I wanted a flat, non-sticky-uppy surface that was sealed firmly to the plank on all edges. It was a bonus that I think the skins are pretty, and who doesn’t love a pretty contact obstacle? You can get a kit and form the skins yourself, but that was more than I wanted to take on, skill, time or garage space-wise.
Enough about the why – let me get to the how…at least in reference to the skin type rubber. First off, my plywood topped DW didn’t have slats. If you have slats, I’d strongly recommend taking them off to sand your wood base as flat as possible. Trying to cut and fit rubber sections between wooden slats – and get the rubber tight to the wood joints – would be a nightmare. If you want slats, the skins have a slat option. More details on this later.
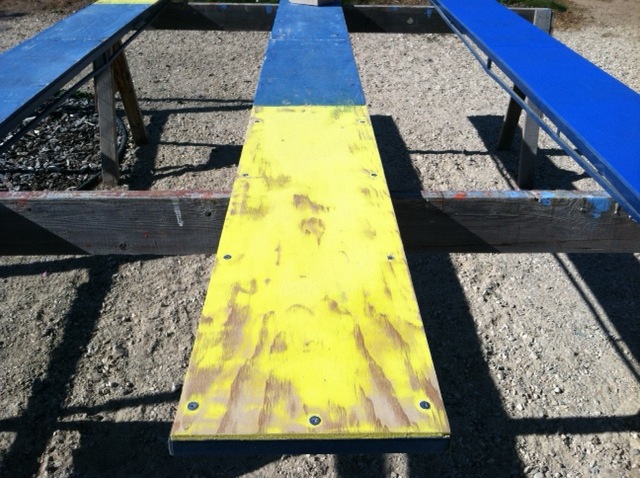
First, sand the boards as flat as possible so the rubber will have a uniform surface to adhere to. If your plywood is warped at all, it might be better to just replace it. I used a palm and belt sander. The belt sander did the majority of the work, and the palm helped get the edges and areas around the screw heads. When you buy sandpaper (and you’ll want LOTS of it), find a grit as coarse as your sanded surface. Then choose one coarser than that…it will look like paper with small rocks glued to it. Just a warning if you’ve not used a belt sander before…before firing it up, HANG ON. Holy crap, the darn thing took me for a ride the first time I pulled the trigger. I used to run a chain saw at work, and I think that sander called the shots in a way that no Stihl ever did.
A good sanding will look like the center plank in the photo – some paint and sand base remaining, but a much smoother and glue-friendly surface overall.
I then gave the ramps a couple of coats of paint each to seal the wood. A small foam roller worked well. If you need to adjust your contact length, this is the time to do it. In my case, I was changing from 42″ to 36″ contacts, so painted the top and sides of the wood to match.

Gluing: I followed the manufacturer’s advice and bought the “Wozzit” glue instead of using a rubber cement type glue. The huge plus is that the Wozzit glue allows for some adjustments once the rubber is stuck down…I could move the entire rubber sheet back and forth to make sure I had it on straight and lined the edges up carefully. Once the rubber cement glue adheres to the rubber skin, you’re literally stuck with what you’ve got. I can’t even stick a decal on my car window without messing it up…I was NOT going to screw around with a giant sheet of rubber!
The instructions that were included weren’t bad, but while they mention you’ll need clamps, they don’t mention how many clamps. You’ll need a lot. Fewer if you don’t have the skin with rubber slats, but if you do, you’ll need 1-2 clamps per section between rubber slats and some wood pieces to put between the rubber and the clamp. What worked best was to spread glue on the ramp in foot long sections, unrolling the rubber and clamping as we went. When we ran out of clamps, we stopped gluing for the day. The next day, we continued where we left off, with no problems. I’d imagine an A Frame could be done in a similar fashion…if you don’t use contact cement, a couple people could unroll/glue as they went, and adjust the edges as needed.
Here’s a picture of our gluing operation in action; note all the high tech devices that were employed to weight the clamped wood down. It wasn’t pretty, but it worked. Where ever the glued wood was in contact with the rubber, it stuck, but a few small areas near the edges didn’t get direct adhesion and weren’t stuck. The next day, I shoved a knife blade with glue into those spots, re-clamped and viola! Perfect! One more tip – it was a little cold when we glued, so we put the glue bottle in a bucket of hot water. The glue flowed and spread beautifully.

No soup for you!
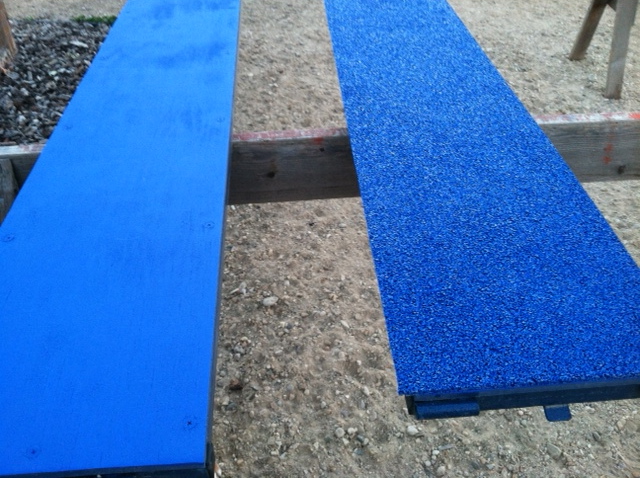
And here’s what it looked like when done. The rubberized plank on the right still needs trimming. We did that with a builder’s utility knife, but I’ve also seen some pretty handy trimming on YouTube with an old electric carving knife, if anyone can convince their Mom to part with that ’70’s must-have.
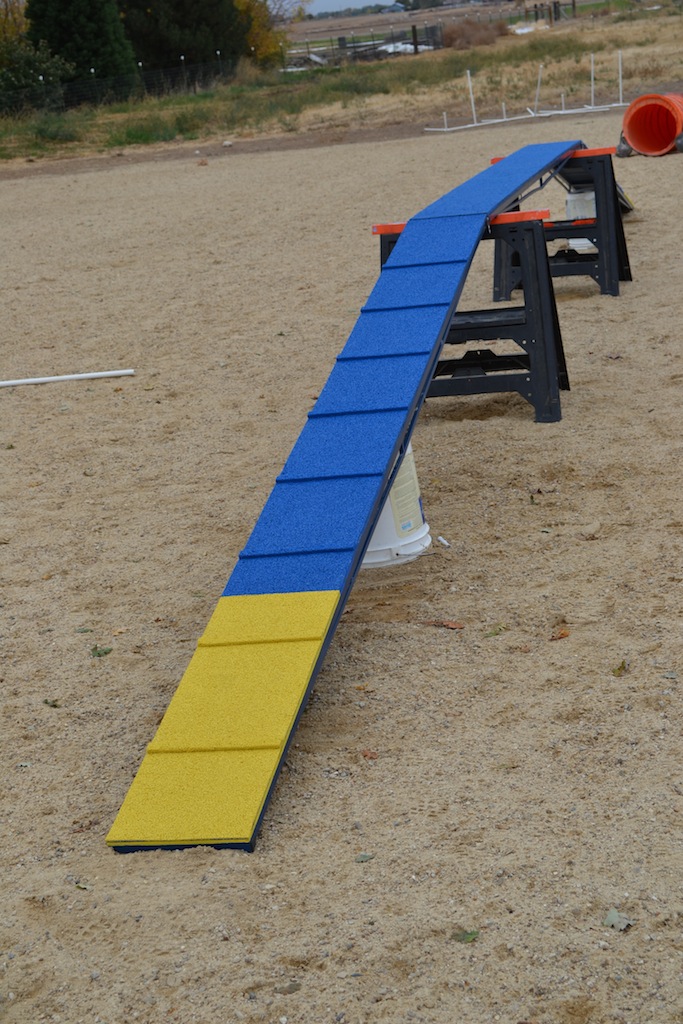
 And done! The planks look beautiful, the rubber surface is almost flat on top.
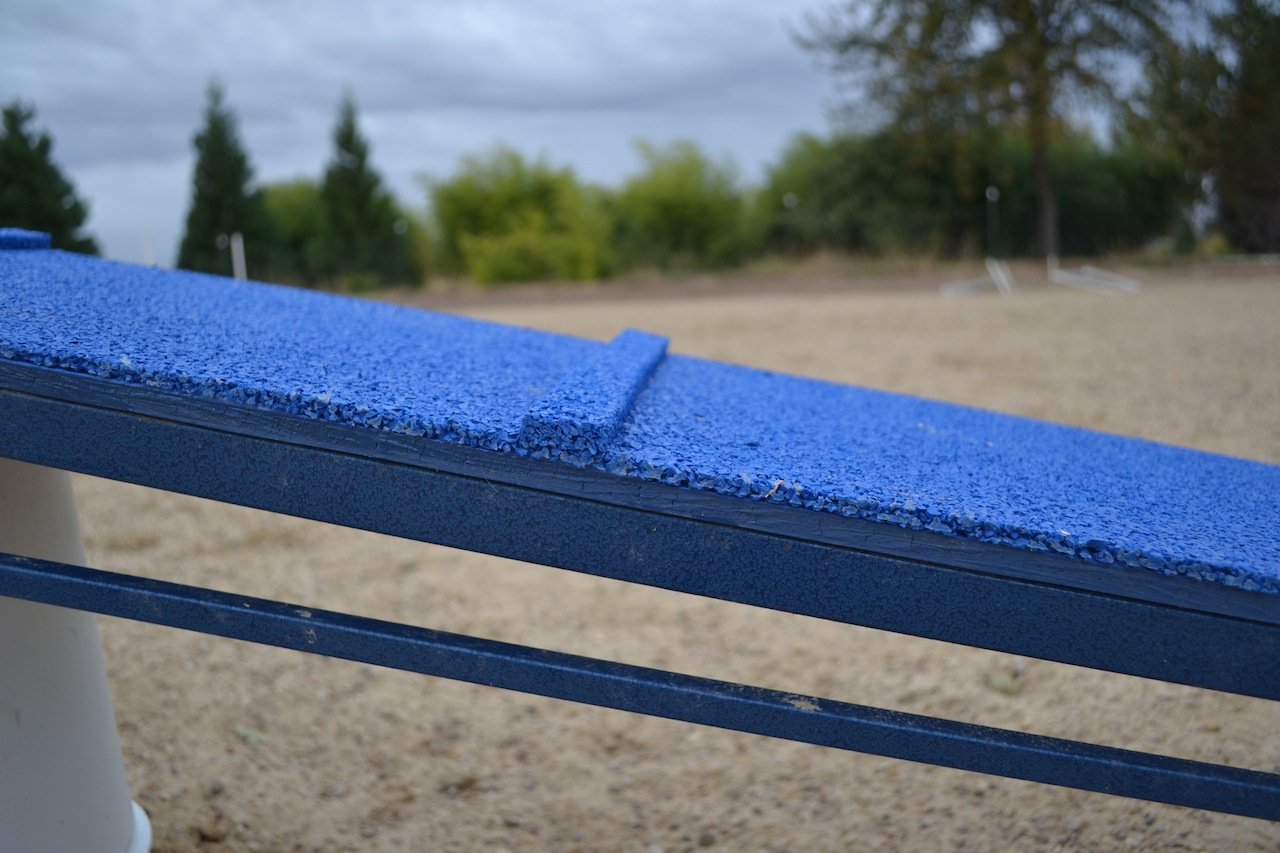
I’d mentioned slats earlier. I’m not a huge fan of slats, but decided to get them because it’s required by the majority of the US and international venues, and didn’t want Des’s first taste of slat to come in a trial. The rubber slats are formed out of the same rubber material, and literally fused to the surface of the contact rubber. There are no gaps between the rubber surface and rubber slat, and the slats have a small bit of give, just like the surface itself.
 And how do the boys like the rubber? Des demonstrates below. Well, maybe that’s not the best picture to illustrate paw grip…now that I think about it.

I can’t address longevity yet, but upkeep in my sand field means I break out the broom to sweep it off every now and then. It’s sat through quite a lot of snow and two weeks of sub-teen (and zero) temps this winter, and the edges remain where I stuck them. We’ll see how it handles the thermal nastiness of summer, but so far, rubber does indeed rock!

If you ever hint hint decide to come to Utah for USDAA trials Coleen has rubberized all of her contacts 🙂
Nice hint! You know I love coming south, too!
Hey, don’t forget…another rubber DW right down the street as well. I must say I envy your project ability. I went the more expensive route and just paid for it. None the less, so far so good during the winter as well. They are definitely heavier, but pretty and hopefully will last much longer. Next stop, the A-frame. I was thinking that if Hope can do it, I can probably do my own as well. I’m intimidated just by the pictures. Now, I’m thinking I better save up some more money!
You can do it! If you look at it just one step at a time, it’s less intimidating. It’s fairly straightforward after having done it once, and I’m willing to help, too! 🙂
Oh I’m so glad you left me a comment so I could discover your blog! Love the merlie boys. And I’m going to be putting new planks on my DW this spring and was wondering how to rubberize. 🙂
Your blog is great, too, Julie! Rubber is gooood! 🙂